Deploy a Web Server with SideApp
- SideApp is a feature that allows you to deploy and run Docker containers on Circuit.
- For details on features and specifications, please refer to this page.
- This tutorial explains how to use SideApp.
Deploy SideApp and Display HelloWorld
Overview
- Download the Nginx Docker image from DockerHub and run the HTML file created from Canvas using the Injection feature.
Final Product
- Canvas data aimed for completion in this tutorial: Sample Canvas
(Right-click and choose "Save link as" to download the file)
- In this sample file, there are no restrictions on accessible IP addresses for the endpoint in Workspace ws1.
- If you modify and customize this sample for your use, please refer to IP Address Restriction Settings and configure limitations on public access.
Tutorial
1. Create a new project and add a SideApp node.
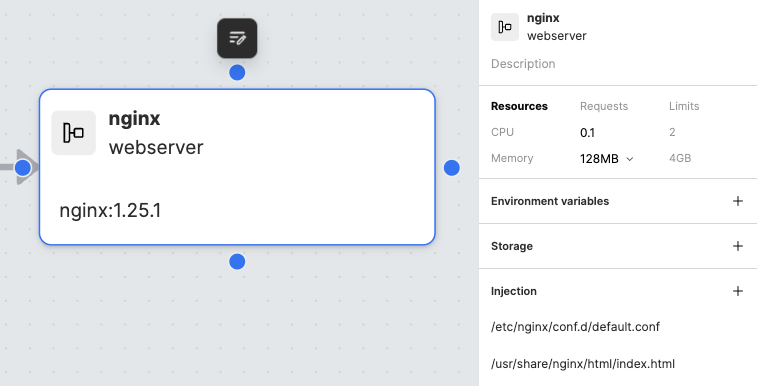
2. Add values to the SideApp node
Enter the following for each item in the node.
| Item | Value | Description |
|---|---|---|
| Title | nginx | Label for management in Canvas. Input is optional for managing the node on Canvas. |
| Name | webserver | Specifies an arbitrary ResourceName on the Blueprint. |
| Image | nginx:1.25.1 | Enter the container image URI. This can be a URI specified by the docker pull command, not just the DockerHub image repository. |
3. Add Injection
Use the Injection feature to configure the container's operation. The Injection feature allows you to specify the file executed by the container image by setting a file and its path from Canvas.
Select the SideApp node and choose Injection from the menu that appears on the right side of the screen.
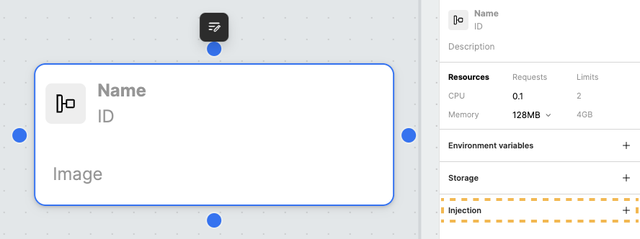
Press the + icon twice and enter the following for each item.
Settings for the first Injection
Edit the default.conf file of the downloaded container image to define the execution content.
| Item | Value |
|---|---|
| Path | /etc/nginx/conf.d/default.conf |
Click the edit icon to open the edit window and copy the following code to configure nginx.
server {
    listen 8080;

    server_name studio.(envId).studio.exabase.ai; # Change this to your domain name

        location / {
            root /usr/share/nginx/html;
            index index.html;
        }
}
This configures the web server to display index.html located at /usr/share/nginx/html when accessed.
Settings for the second Injection
Create the index.html to be displayed.
| Item | Value |
|---|---|
| Path | /usr/share/nginx/html/index.html |
Click the edit icon to open the edit window and copy the following code to define the content of the HTML file.
<h1>Hello World</h1>
The definition of the HTML content is now complete. For the tutorial, we have kept the HTML simple, but you can freely modify it and include JavaScript, etc.
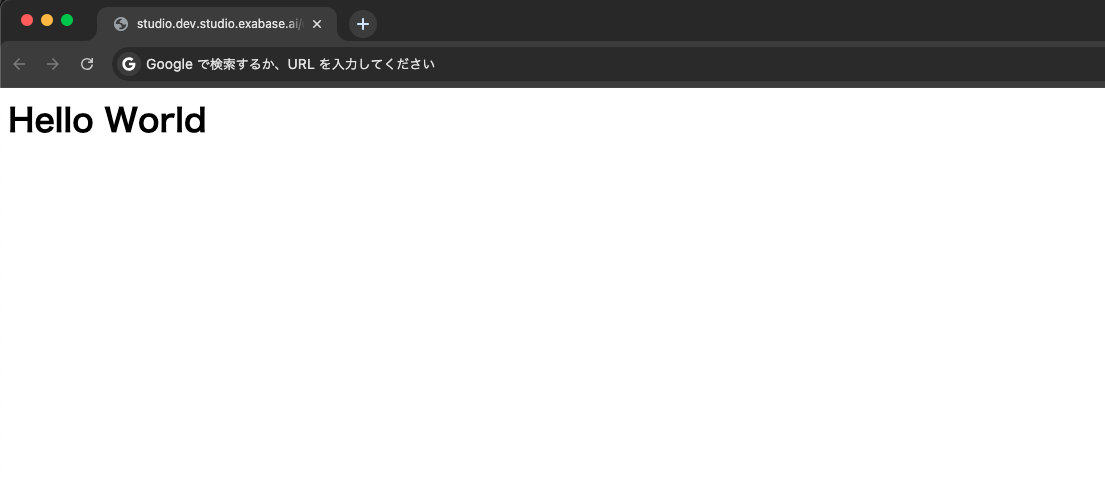
4. Deploy and Display HelloWorld
Click the Deploy button, enter your tenant name, and deploy.
Once the deployment is successful, access it via your browser using a URL similar to the one below with your own information:
https://studio.{env-name}.studio.exabase.ai/{tenant-id}/{workspace-id*1}/webserver/
*1 If you do not create a Workspace, canvas will be applied automatically as the WorkspaceID.
If successful, "Hello World" should be displayed in the browser as shown below.
5. Further Explanation/FAQ
Q. How is the file path for default.conf determined?
- A. It is determined by how the Docker image is created, so refer to the documentation provided by the developer or ask them. In this case, we are using an image from the DockerHub repository, so we can check the mount point for the configuration file from the GitHub listed in DockerHub.
Q. What if the developer does not provide the mount point for the file, can I still use it?
- A. It may be possible to resolve this by using tools to analyze the Docker image. Tools such as dive can be used.