Deploying an ML Model for Video Processing
Preparation
(1) Download Files
- sample.zip
ebstudio_sample_mediapipe_blank.json: This is the JSON file for the working canvas used in the tutorial. Import it into the canvas.ebstudio_sample_mediapipe_fin.json: This is the final version of the canvas. Refer to it at the end.sample.mov: A sample video file.
By default, the IP address is publicly accessible
- This sample file does not restrict access to the endpoint located in Workspace ws03.
- If you modify and customize the sample, please refer to Setting IP Address Restrictions and configure it to limit its exposure.
(2) Access StudioApp
Please access the following URL. Replace <env-name> with your own.
https://app.<env-name>.studio.exabase.ai/
 # If you are unsure about <env-name>, please contact your internal representative.
Tutorial
1. Create a New Project and Import the JSON File
- Create a new project using the
+ New Projectbutton in StudioApp (you can set the project name freely). - Import the downloaded JSON file into the canvas.
2. Review the Design on the Canvas
The canvas is mainly composed of two parts:
- The triggering part: Monitors external data and triggers processing based on conditions.
- The processing part: Reads data and executes the ML model.
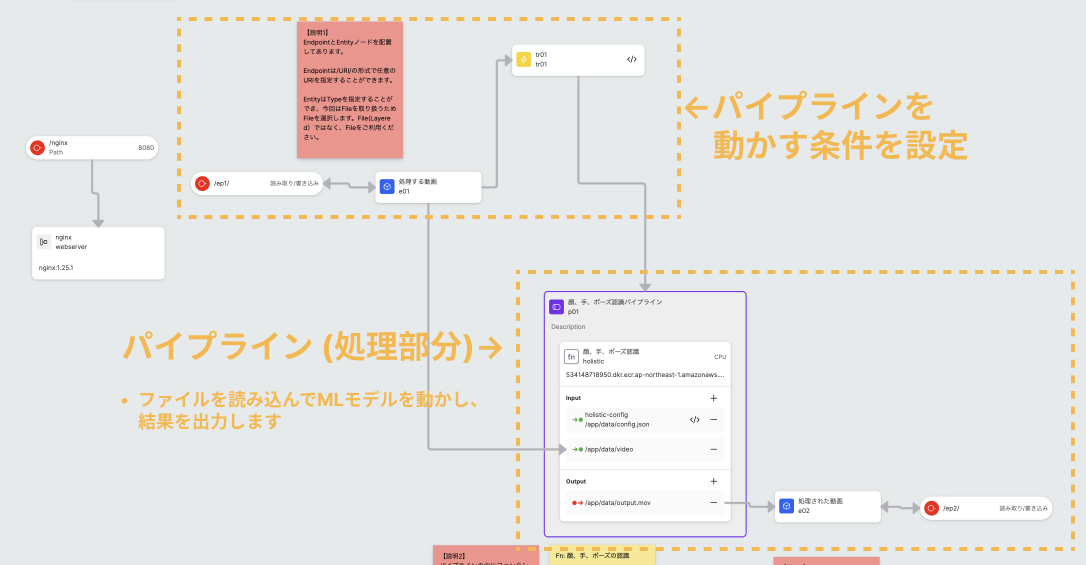
For more details, please refer to the notes on the canvas.
3. Implement Processing on the Canvas
Refer to the notes on the canvas for specific implementation methods.
- In this tutorial, you will implement the contents of the processing part (pipeline).
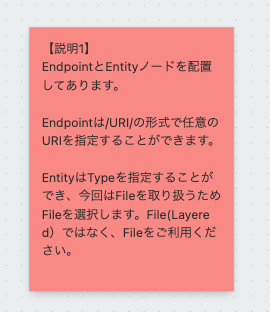
- (1) Retrieve the video file using the reference information stored in
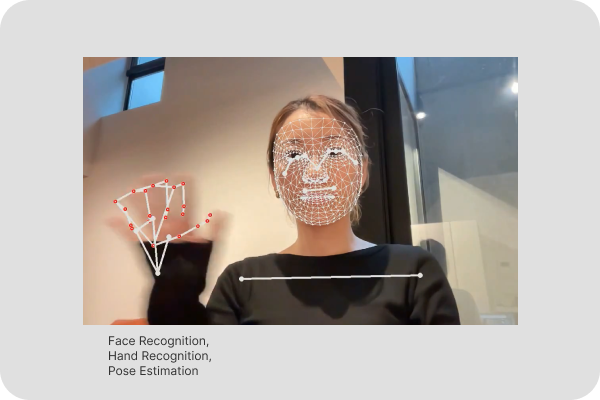
FileEntity e01. - (2) Recognize faces, hands, and poses.
- (3) Upload the processing results to storage in
FileEntity e02.
- (1) Retrieve the video file using the reference information stored in
- The ML models used for processing are images already uploaded to AWS ECR. Specify the image to be used from the image URI of the Function node.
4. Deploy
- Click the
Deploybutton in the upper right corner of the screen to deploy.
5. Execute Video Processing
- Once the deployment is successful, select the Endpoint connected to the SideApp and access the page displayed in the right panel’s URL to upload the video.
6. Check the Execution Results
- Once processing is complete, a value will appear in the FileId on the screen, and a download link will be created. Download the video file from the link and confirm that it has been processed correctly.
- If the processing is successful, a video like the following will be generated.
(Reference) How to Use Your Own Model
- Please refer to Adding Your Own Models or Functions.