Account Creation
Creating an account for the exaBase Studio management screen is very simple. You can complete the registration by entering your email address on the new account creation screen, going through the verification process via your email, and obtaining authentication.
Each customer is assigned a unique ID for accessing the management screen's URL. Typically, a representative from ExaWizards will provide you with the URL for the management screen. If you are unsure, please consult your ExaWizards representative.
- Example
- Access StudioApp at
https://app.(env-name).studio.exabase.ai/ - Replace env-name with the identifier for your specific environment.
- Access StudioApp at
New Account Registration and Verification
1. Access the New Account Registration Screen
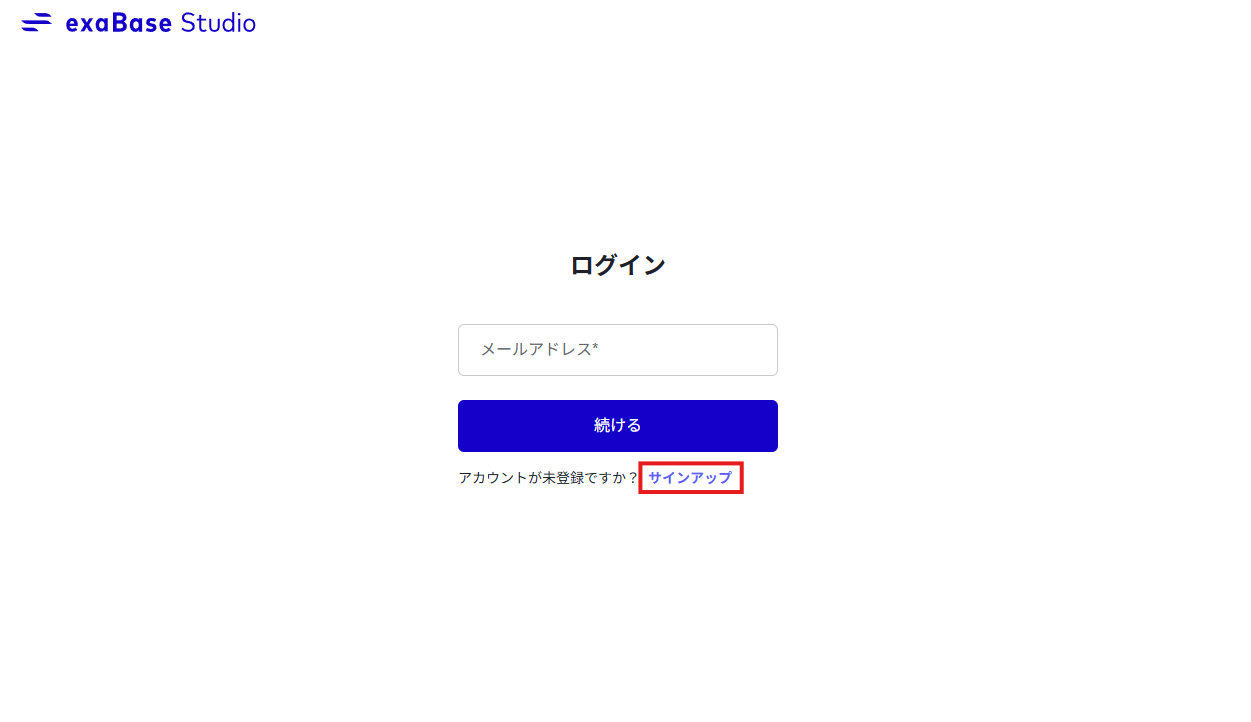
First, open a web browser and navigate to the exaBase Studio management screen URL, then click the "Register" link at the bottom.
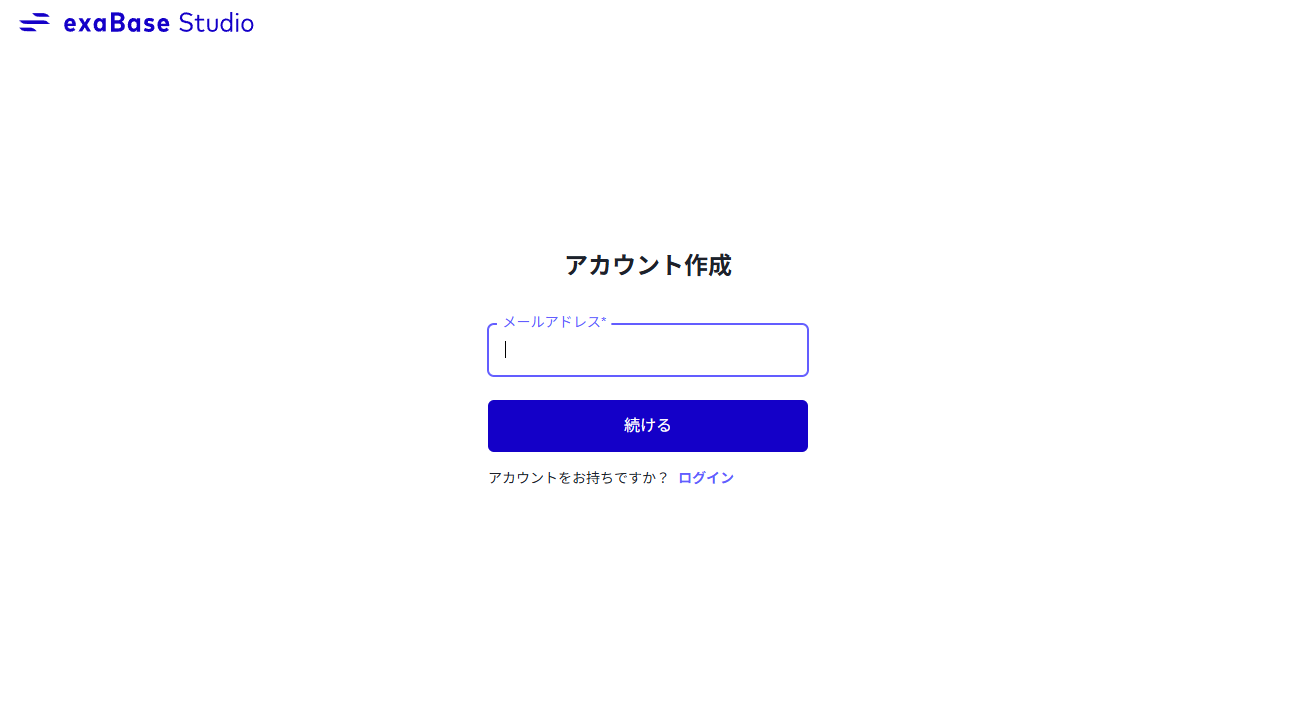
2. Register a New Account
You will be redirected to the new registration screen. Enter your email address and a new password, then click the "Create Account" button.
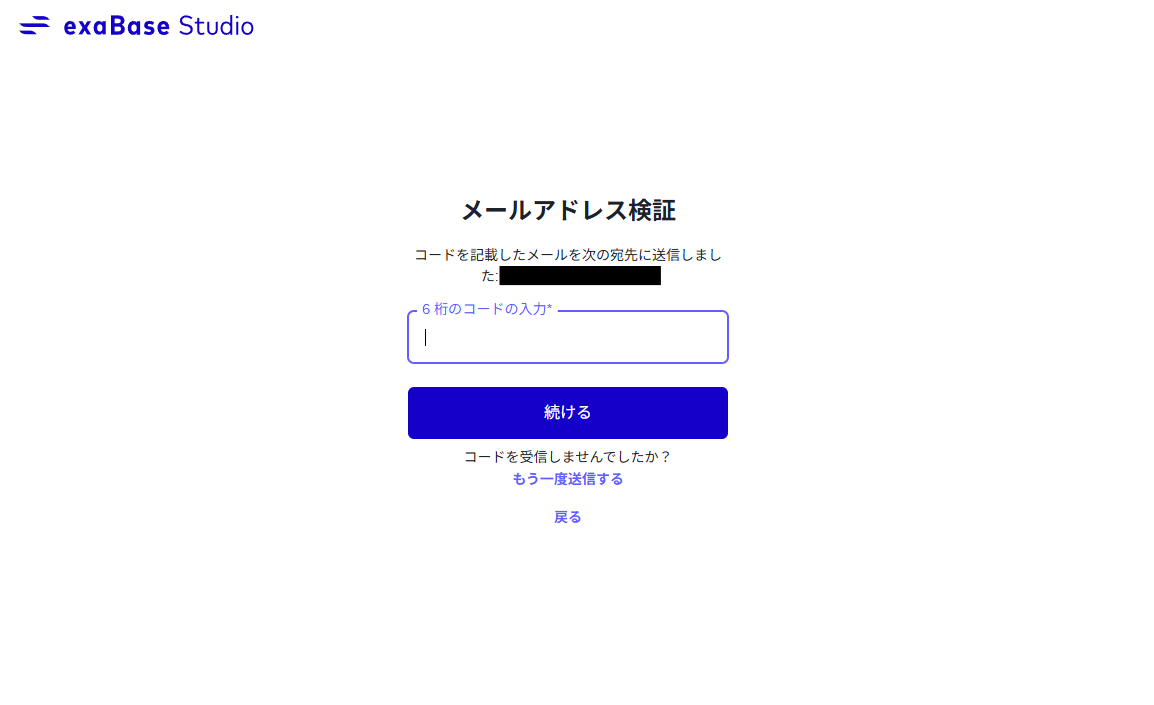
3. Complete Email Verification
Once the account is created, a verification email will be sent to the registered email address. Check for the Verification code.
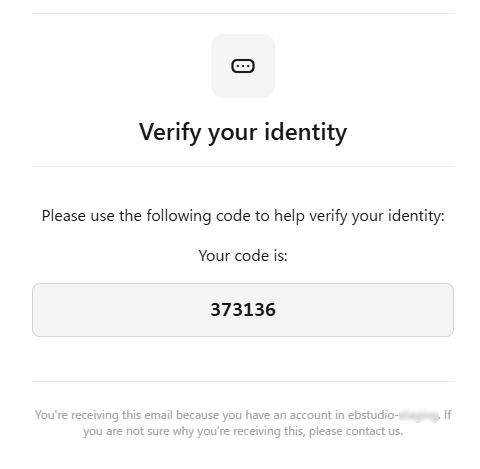
Enter the Verification code received via email and click the submit button to complete the account creation.
4. Set a Password
Enter your password, then click the Continue button. Your account will be created and you will be automatically logged in.
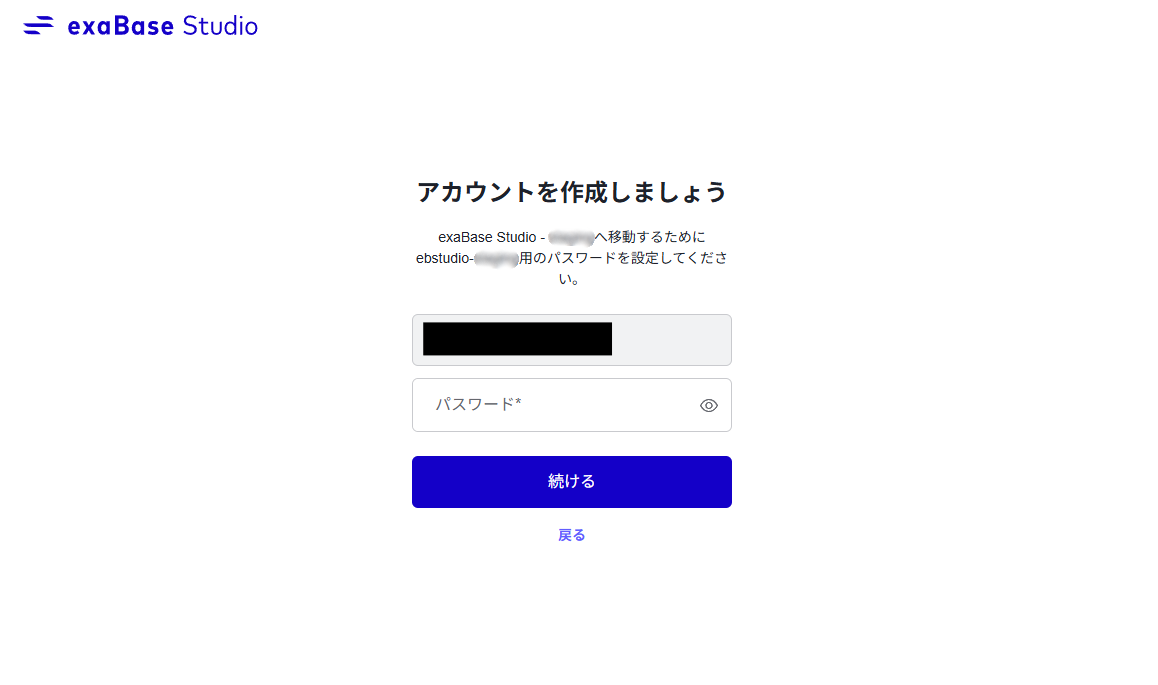
If you wish to change your password, use the Forgot your password? link.
5. The password requirements are as follows
When setting your password, please ensure it meets all of the following criteria:
| Item | Requirement |
|---|---|
| Length | At least 8 characters |
| Character Types | A combination of at least three of the following: lowercase letters (a–z), uppercase letters (A–Z), numbers (0–9), and special characters (e.g., !@#$%^&*). |
| Breach Check | Must not be a commonly used password |
| Similarity | Must not closely resemble your account information (e.g., username or email) |
Settings
You can view your account information by clicking the account icon at the top right and selecting Settings.
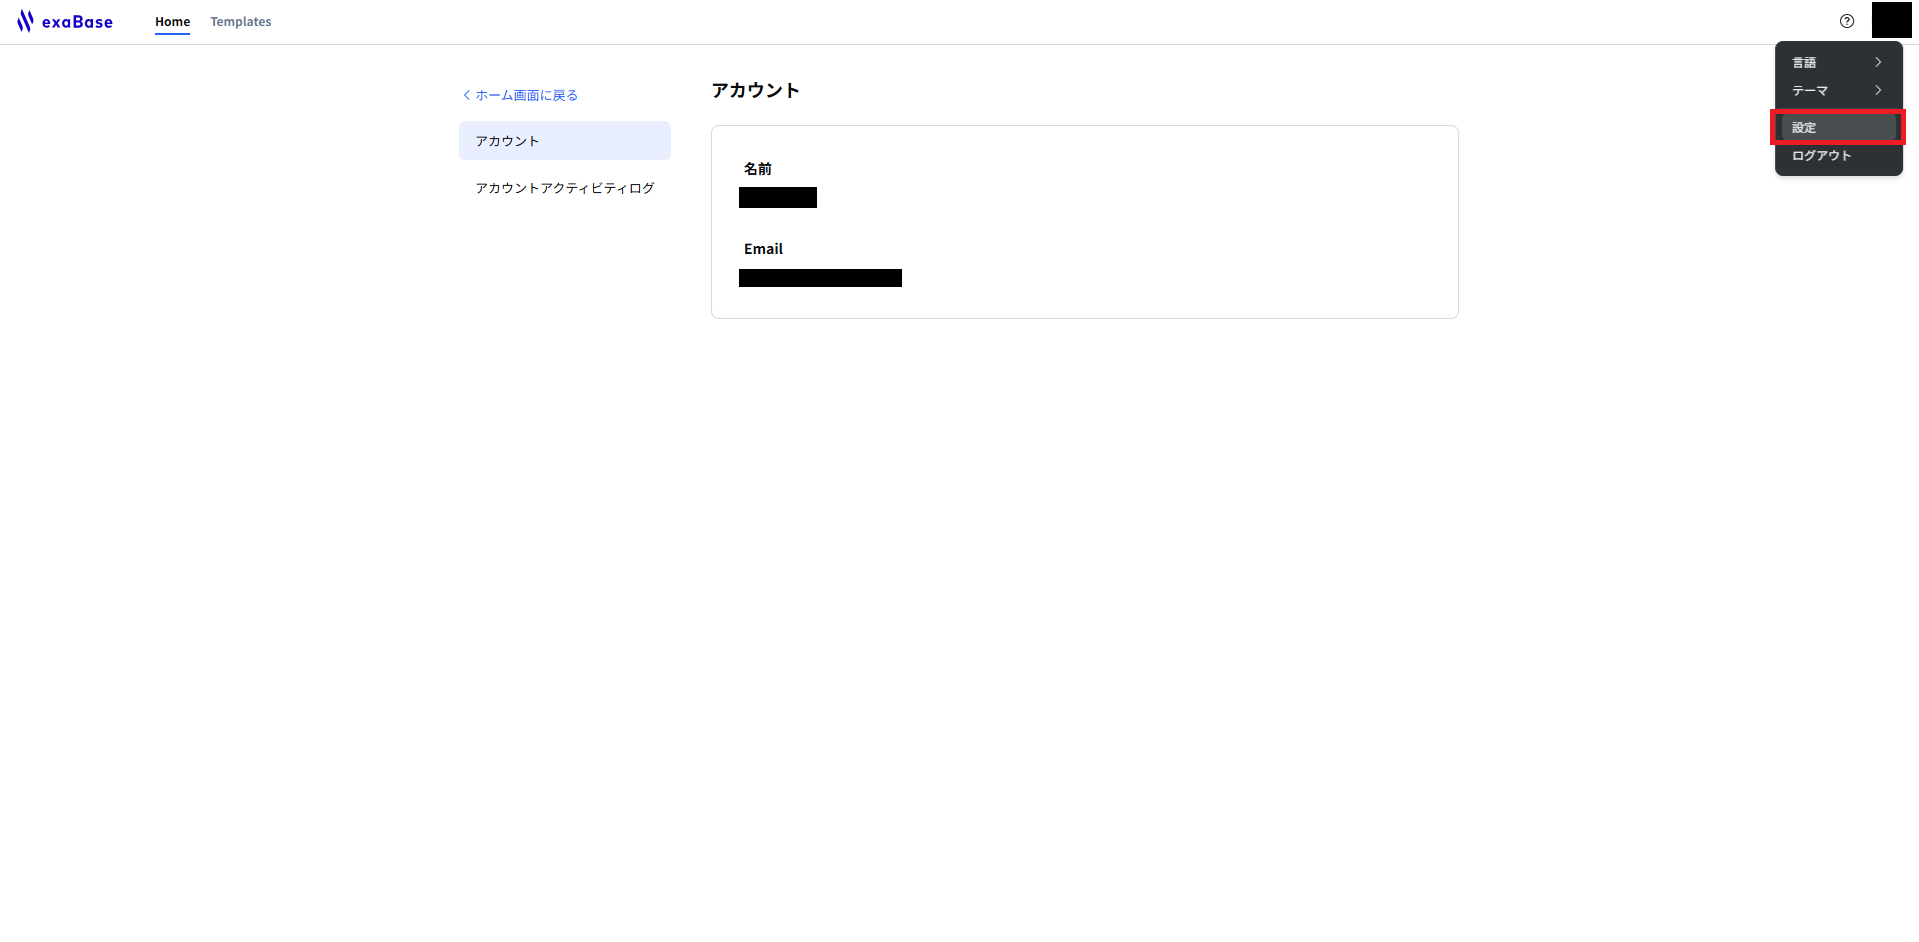
Account
- View your own account information (such as name and email address).
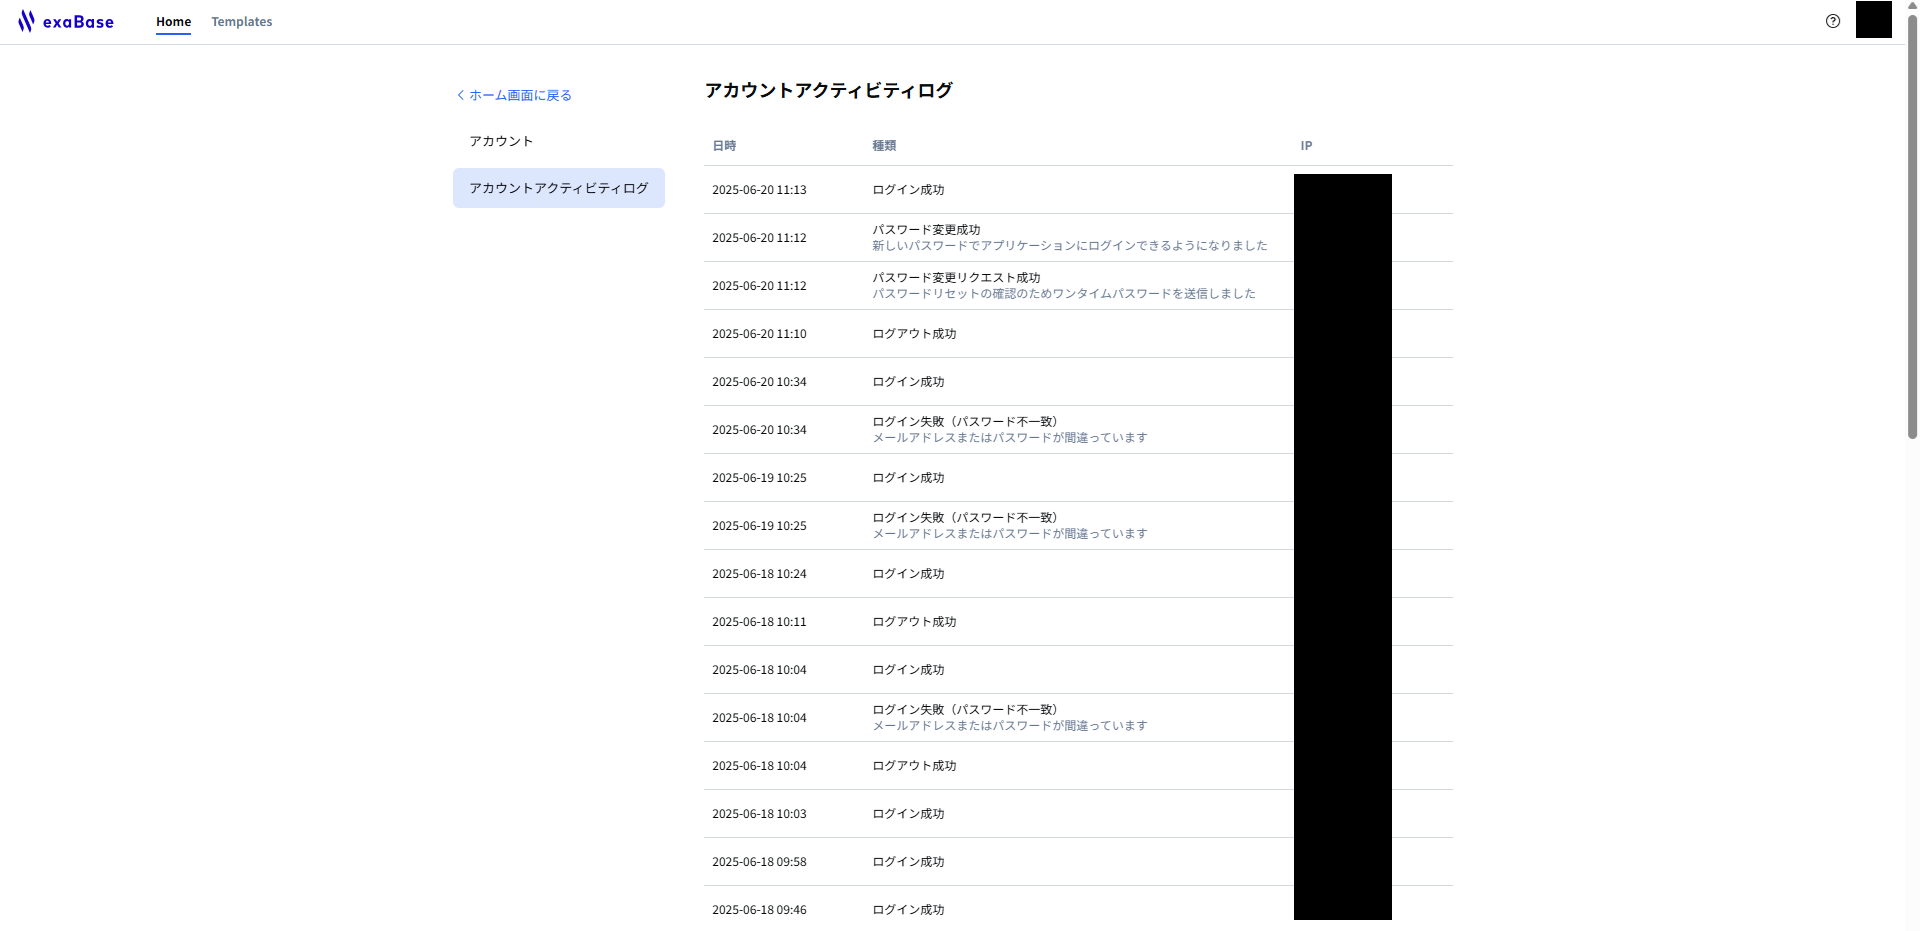
Account activity logs
-
To review your account's authentication history (such as login and logout), click your account icon in the top right and select Account activity logs from the sidebar.